Terrain. It's probably one of the most important foundations of a game because you need something to stand on, and in any game prototype I've made to date, it doesn't feel real until you've got some form of terrain.
I've experimented with a lot of different ways to handle terrain, including playing about with how quite a few existing engines handle it, so I've got a solid idea in my head of what I want to make; so let's make it.
The first thing I needed was a foundational grid. This is essentially the concept of how the world is broken up, not just in terrain, but eventually objects, lights and so on. Combine this with a "tile render distance" - a value which determines how many tiles should load around the camera, and we have the very basics of a streaming world.
As we move about, tiles "load" and "unload" based on the render distance. At the moment, this isn't actually doing anything beyond showing a visualization.
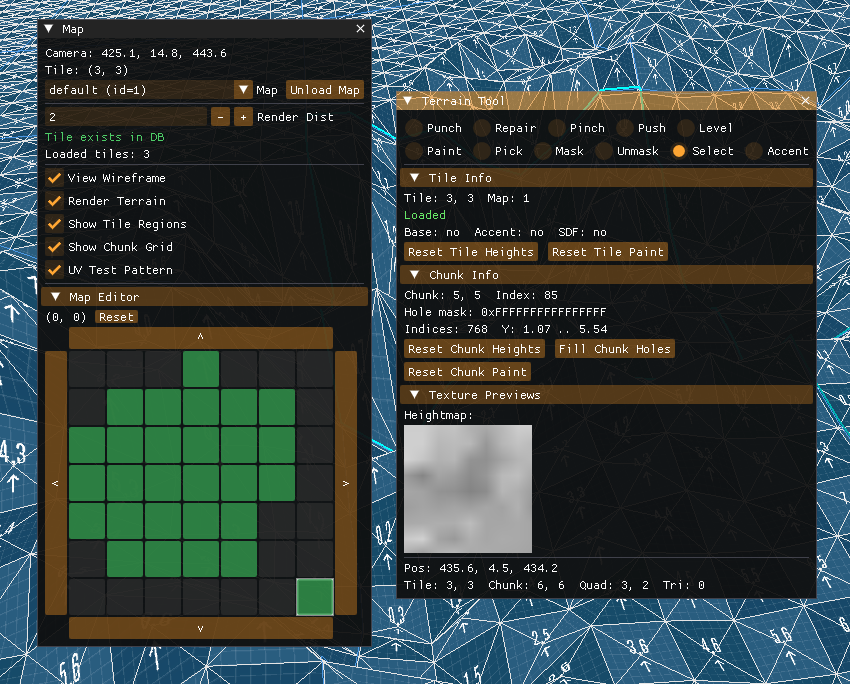
What we need now is a concept of which tiles exist. The world is not meant to be infinite, so we need to be able to define which map tiles exist. For this, I created a super simple map editor that allows us to create/delete tiles in a grid. This happens entirely in-game.
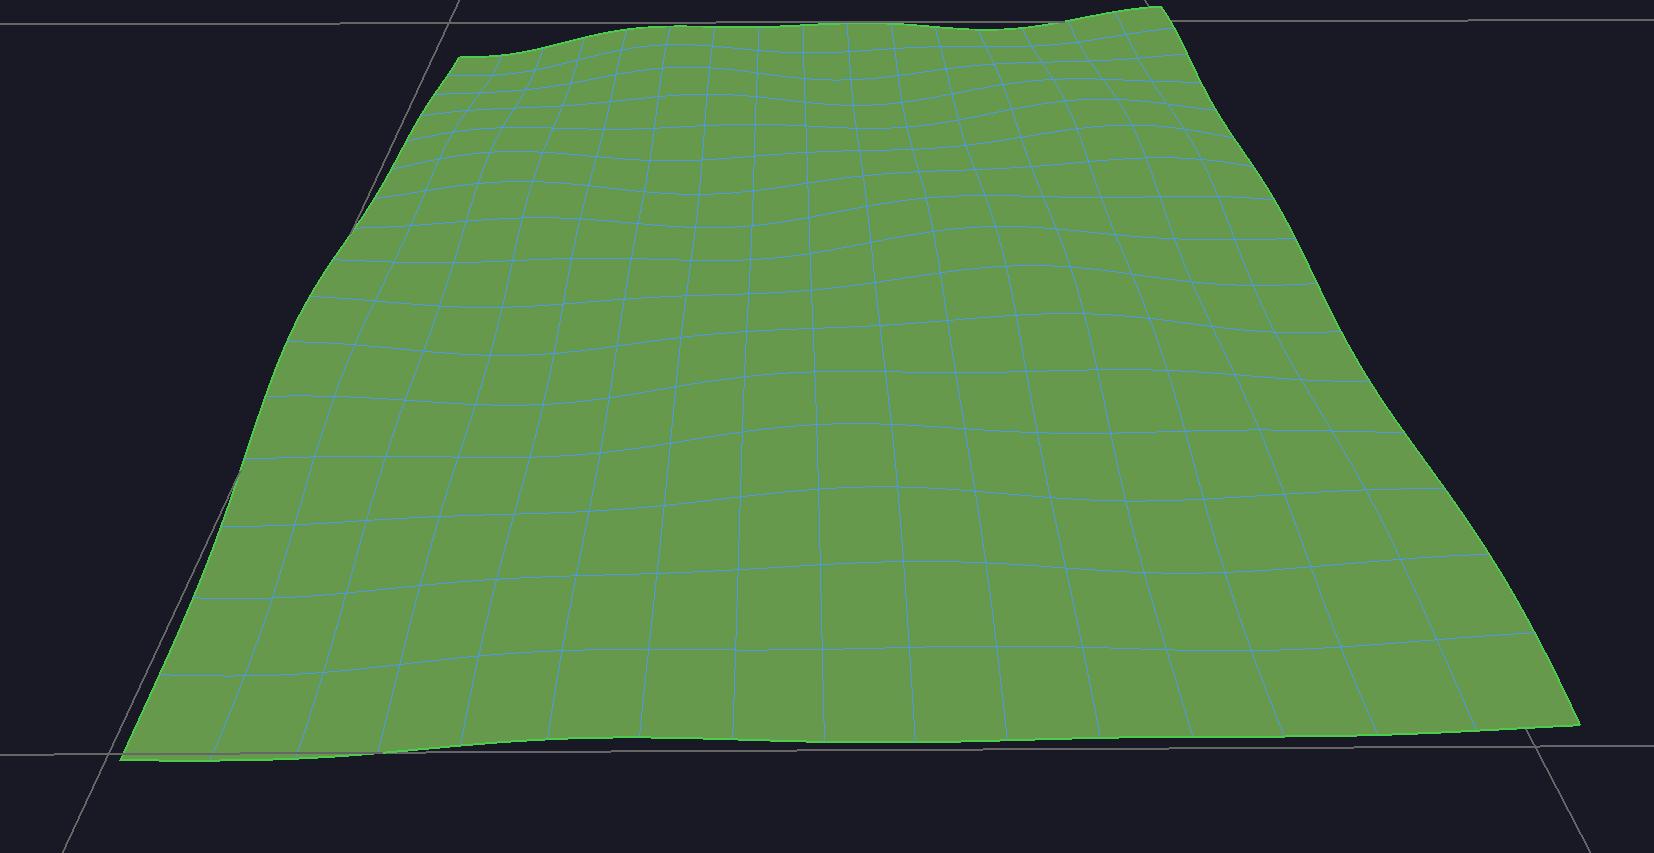
With the concept of tile creation, I can actually do something with it - terrain! Rather than jumping straight into terrain editing or anything fancy, I want to get the foundations right first. When a tile is created, I just generate some terrain heights using sin/cos for now.
Okay, cool, but what is a tile? I wanted to use numbers that made sense for laying things out in memory efficiently, but also keeping the positioning logic sensible enough. An individual map tile is 128x128 world units, subdivided into a 16x16 grid of chunks (8 units each).
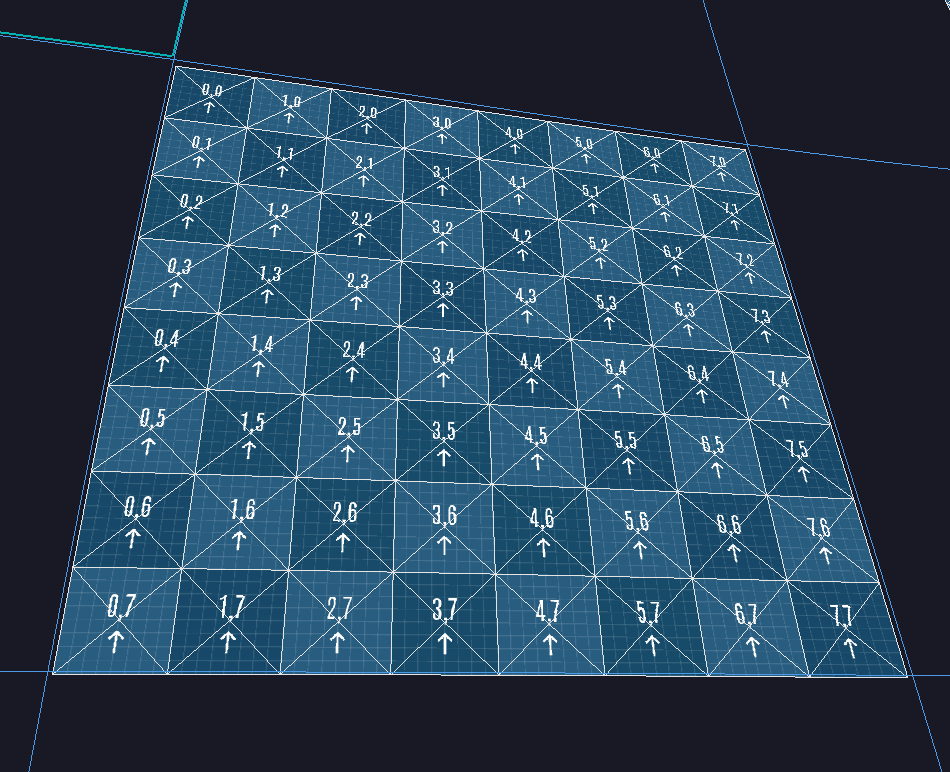
I'll explain why I've broken it into chunks in a moment, but let's look at how they work first. If you look at the image below, the blue outline is one chunk, inside that you can see the triangle mesh forming squares (aka "quads").
For each quad, I store the height of the corners as integer positions (129x129) and then the height of the center vertex at +0.5 offsets (128x128 grid). With these two grids, we can form the quads efficiently out of triangles.
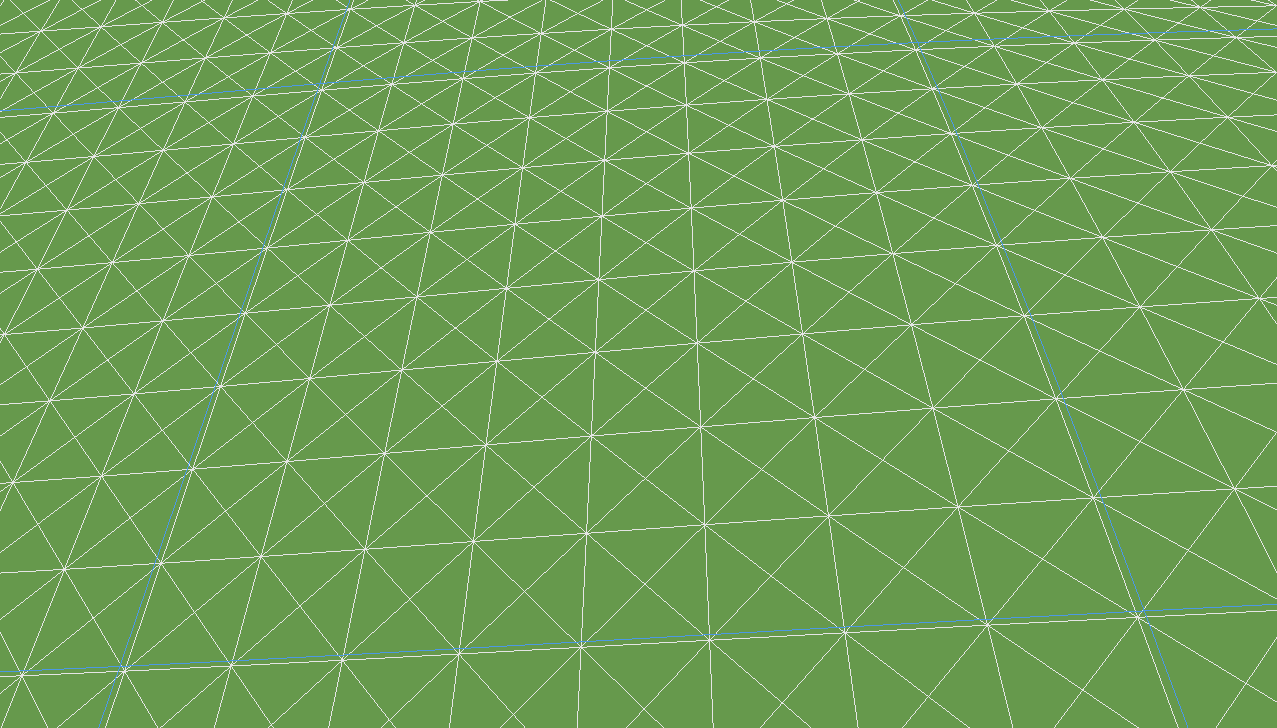
Using this dual-grid approach has quite a few advantages over a more simplistic tile approach. It gives us better height control, no diagonol bias when shading, and it works perfectly with what I want to do with terrain painting (next post).
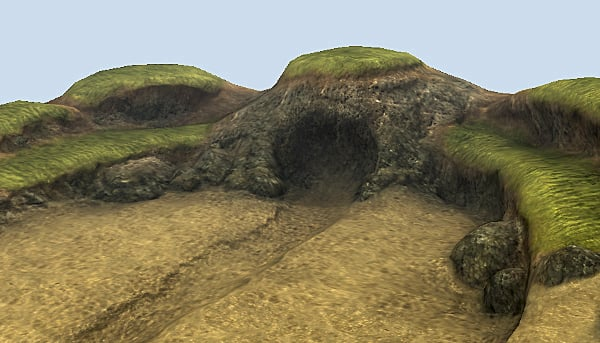
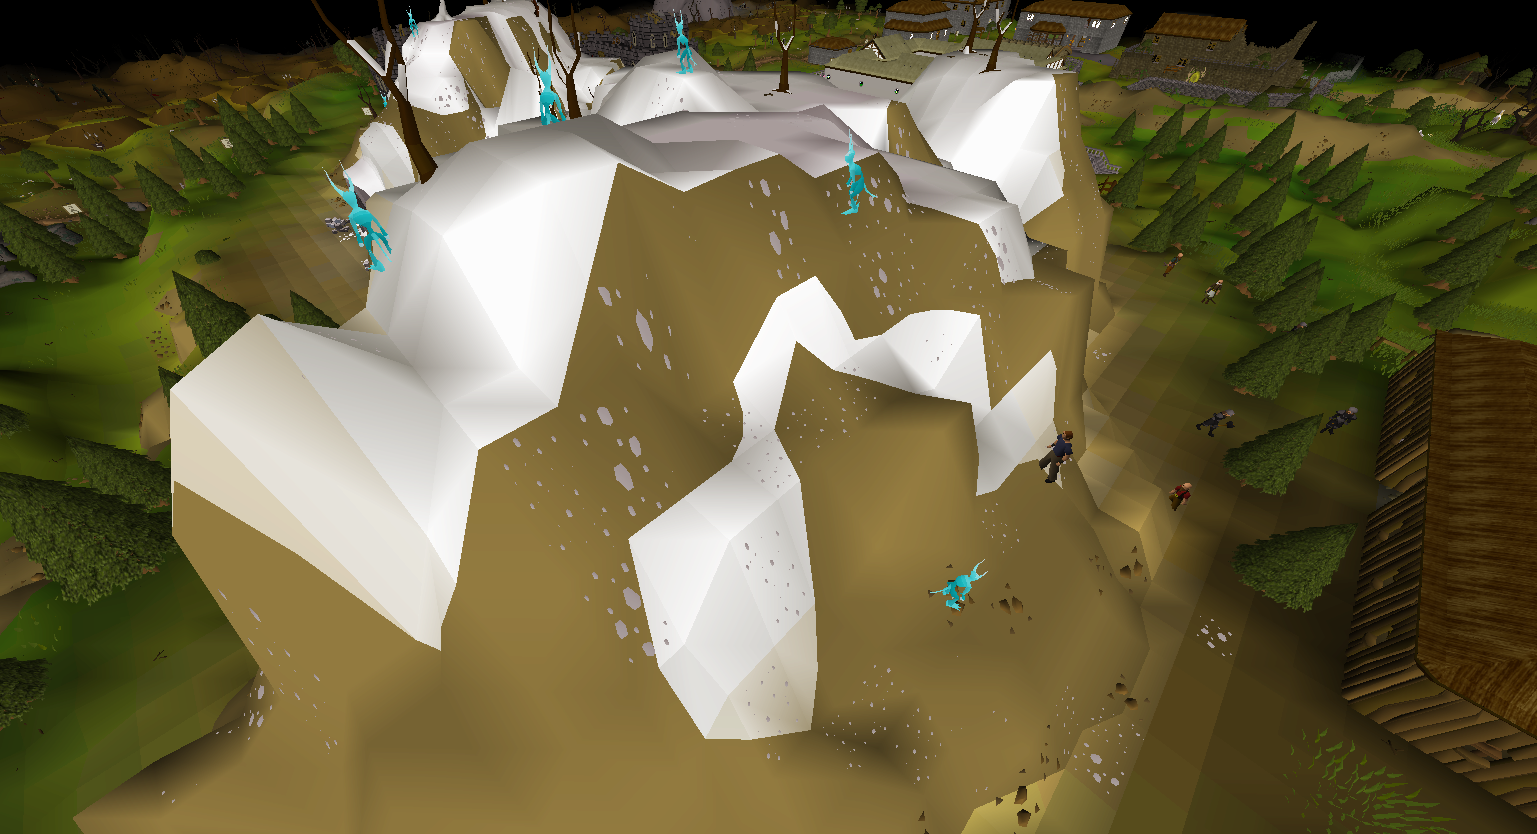
If we look at Old School RuneScape, a game which sticks with the 2-triangle per quad approach, you can see that it struggles with fine-grained definition on more extreme terrain.
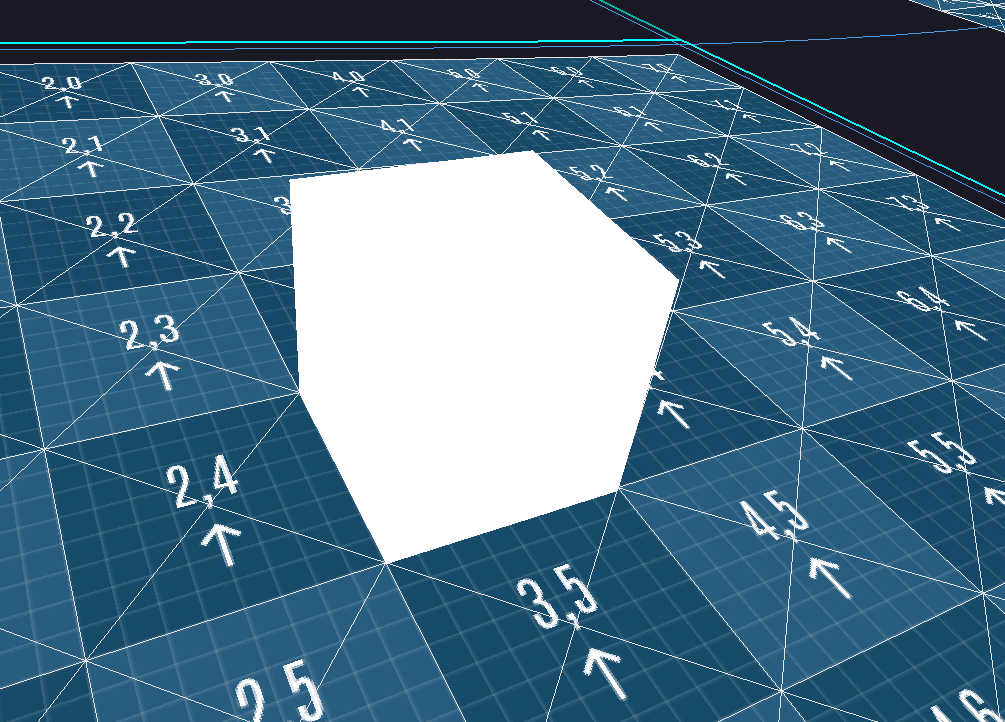
I said at the start that I wanted to make sure the position of things made sense. With the way this breaks down from tiles, to chunks, to individual quads means that a single tile on the terrain is equal to 1x1 unit. We can visualize this with a UV grid.
It's important when it comes to co-ordinate systems that things just make sense and are easy to think about. Doing it this way, if I create a 1x1x1 cube in Blender, it will map perfectly to a tile on the terrain - that's just good business!
As a technical footnote to this chapter, I load/unload the tiles as the player moves about the engine, but to make things as smooth as possible, I don't allocate/free any memory for this. Map tiles are all identical in terms of the memory they need, so the space for the entire map is allocated upfront based on the render distance, and then tiles simply swap in and out without any allocations.
Now that I've created some lovely terrain, the first thing I want to do is rip holes in it. That's not because therapy is too expensive, but because there's a number of scenarios where we don't want terrain.

In a game where you have caves, dungeons, or buildings with basements, you actually go under the terrain. There's a really advanced and technical approach that most games use for this: holes. Yep, holes. Just punch a hole in it.
Remember how I said earlier there was a reason tiles were a specific size and split into chunks? One of those reasons is that a single chunk ends up being 8x8 which is 64 quads. This means we can store the holes in a single 64-bit number. Each bit is either a 1 or 0, which means it's either a hole or not a hole. This is called a bitmask.
As shown above, I made a hole punch tool so I can create holes directly in the engine. Don't worry, I also made a repair tool so I can stitch them back up.
Having nice rolling hills generated by math is lovely, but it's time to get to work designing the fjords. Terrain is a 2D grid of height values, the individual vertices can only move on the Z axis, not the X/Y. This makes creating a variety of tools quite easy.
The first tool is called "pinch". I'm not an environmental artist or sculptor, so I'm making these names up as I go along. If they're wrong, you can always yell at me. But this one is pinch. As with most tools, it has a falloff control so it can be sharp or soft.
This next one is called push. Inversely, it also pulls. Rather than directly grabbing the terrain and pulling it to a desired height, this applies a constant configured pressure to the terrain. Again, this is probably known as something fancy like multiplexactioner, but here it's push.
Once I'm done messing everything up, I can restore balance to the universe with the "level" tool. This essentially brings everything to an average height, allowing me to quickly get rid of peaks or holes.
That's it for my terrain editing tools at the moment, I'll add more as I find the need for them. Being able to quickly build debugging tools has dramatically improved the development process, and building these tools directly in the engine is a lot of fun!
A little extra nugget that I didn't have anywhere to mention is how these map tiles are actually stored/loaded. In my devlog Spreadsheets In a Trenchcoat I went over the data table system I've implemented into the engine, it utilizes that.
Originally, I had three columns: map ID, tile X and tile Y, but I didn't want to bother implementing a more complicated indexing to the data table system, but still needed tile lookups to be super fast.
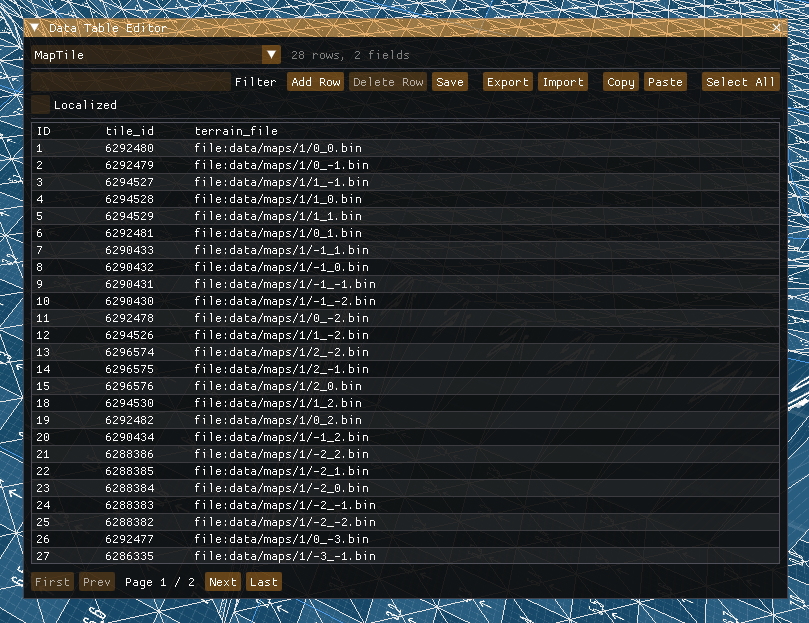
To solve this, I decided to pack all three into a single 32-bit uint. 10-bits go to the map ID, and then 11 bits each for the X and Y (biased by +1024). I'll adjust this distribution if I need more maps or bigger maps.
To get a tile, I simply create the ID, look it up in the data table (column is indexed), then if it exists, the file reference will automatically be a pointer to that files location in virtual memory, which feels like magic.
Get notified when new posts are published.
Comments
No comments yet. Be the first to comment!